Guardian Gorge
Tech Notes: Character Design and Development in Guardian Gorge
In this devlog I'd like to take a little time to talk about the processes I used to design and build characters for my entry to Dungeon Crawler Jam 2023, Guardian Gorge.
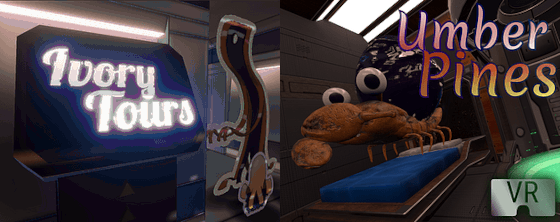
My motivation to find a new process came from two of my previous jam entries, Ivory Tours and Umber Pines, where the process fell short of what I wanted. Ivory Tours' cardboard standees were nice enough, but I wanted to set a higher quality bar; Umber Pines' characters met that quality bar, but because each character took me more than two days to build it wasn't a viable process for a 7-day jam.
Too skinny, too slow.
As an example I'll be walking through the life cycle of Byarn; he's one of the later Guardians the player meets in the game, and a sort of miniboss.
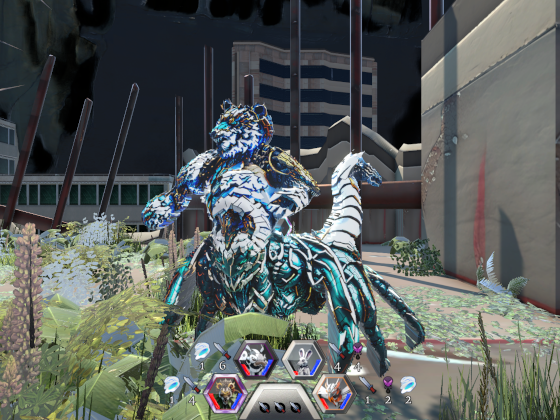
Our hero, ladies and gentlemen.
Like many video game characters, Byarn first came to be as an offhand line in an ideas document.

Does exactly what it says on the tin.
And naturally enough, his first step takes him onto paper. Slight modifications; he decided he really wanted to be a scorpion, not a spider.
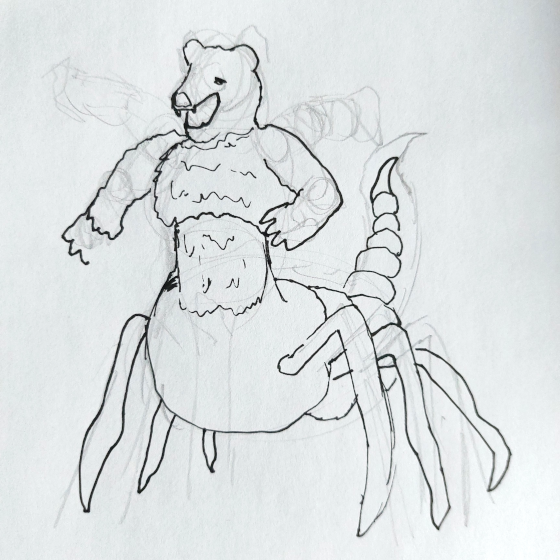
Very far from my best work, but speed is the driving factor here.
So far, so classical. From here, though, we're going to get some technology involved.
The first tool we're going to be working with is what's known as a "generative AI"; in this case, Stable Diffusion. These tools have come to prominence in the last year on the back of their ability to create impressive images from nothing more than a few lines of text. Here, though, we're going to be using them in a much more controlled way; somewhere between AI generation and AI filtering.
For Byarn, we're going to use two technologies alongside regular Stable Diffusion:
- Control Networks allow us to heavily guide and constrain the composition and shapes of the images the AI will generate. In this case we'll be using the image above as a sketch constraint; the AI will try to only produce images that would be final versions of this sketch.
- Regional Prompting allows us to use text to describe what we want the AI to generate in different sub-regions of the image. In this case we decide we want a white bear monster (limited to the upper left of the image) and a green "mecha" scorpion (limited to the bottom half of the image, plus an extra section in the top right which we specify to be the tail).
The next step is a lot of iteration and testing. Contrary to the marketing, generative AIs aren't going to give you great results on your first try, and there are a thousand or more knobs to fiddle with. It takes us a while to dial in the right strength to properly control the image shape, and to insist on the colours we want, but with repeated reiteration of our constraints, cherry-picking of our results, and tweaking of our controls we get to where we want to be. You'll see that while some early images in the process strayed considerably from our desired shapes, the control network brought them back into line with the sketch in the end.
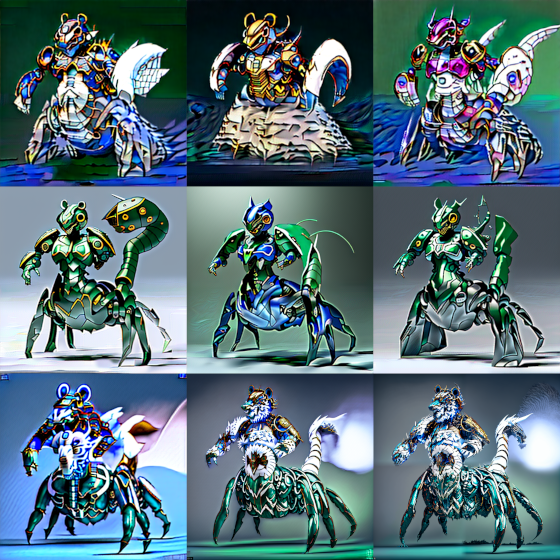
A curated selection from the large number of generated intermediate images.
We now have a 2D image based on our initial sketch that's of good enough quality to use in game (and indeed this image is used for Byarn's collectable token). We want to go further, though; to place Byarn believably in a level, a 2D image isn't enough.
Some day, perhaps not too far in the future, there will be consumer-level AI systems that can immediately generate plausible 3D models from 2D images. They're not here yet, though, so for Guardian Gorge I developed a more low-tech method.
It starts with AI again, though no longer the fancy generative AI of recent years; these are rather older computer vision algorithms. From our 2D image we produce a mask of the main subject, and a estimated depth map showing very roughly how far from the camera the computer thinks each point in the image is.
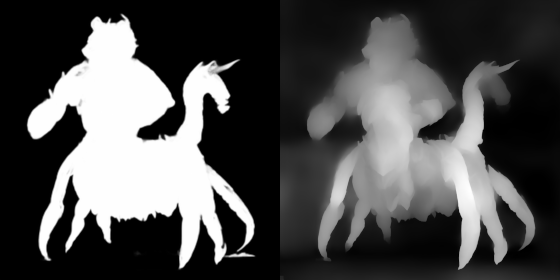
Mask on the left, depth on the right.
Taking these images into Blender, we "thicken" the mask into a solid object: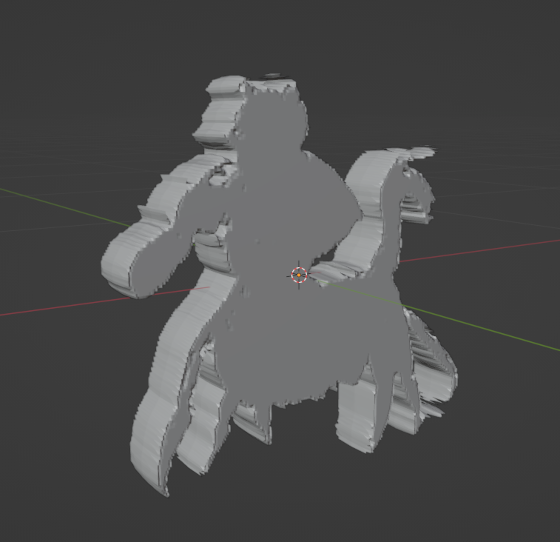
Then, we apply our depth image to both sides of this object as a height map: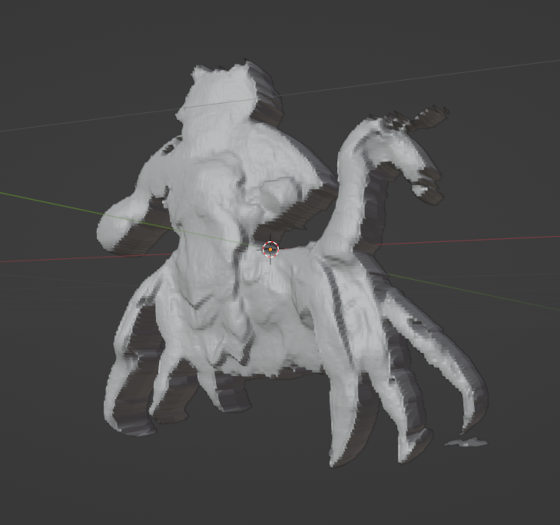
The limitations of this depth map are visible immediately, but let's not worry about them for now. We use Blender's deformation tools to modify the thickness a little, making sure thin parts like the legs aren't too outrageously deep: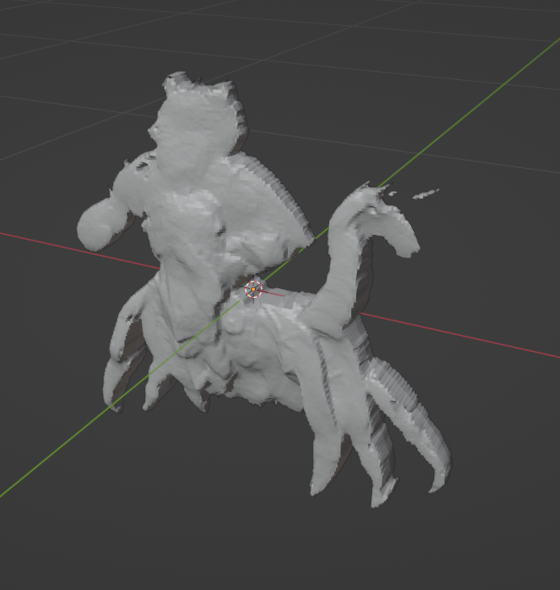
We now have a model. It has a huge vertex count, but one of the secrets of modern gamedev is that vertices are really cheap. As long as the game design is intelligently limiting us to no more than a dozen or so enemies on screen in high resolution at once, this number won't be a problem.
But how does it look?
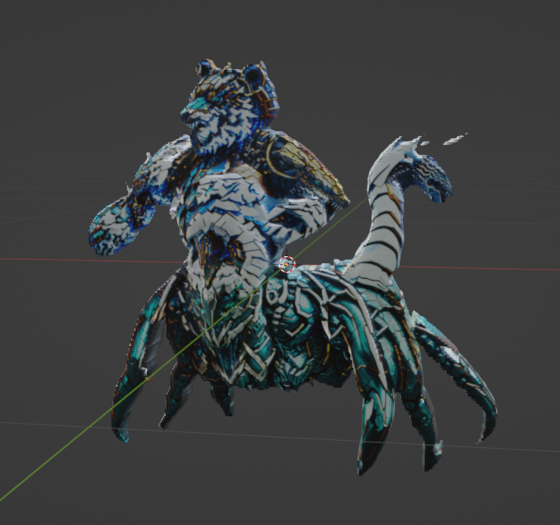
Not half bad!
In spite of the poor quality of the depth map, it doesn't severely impact the visuals because most of our perception of depth is coming from the shading in the 2D image. The 3D model gives us plausible parallax effects as we strafe past the enemy, and can reveal hidden surfaces as it does so in ways that parallax shaders cannot. It looks pretty good in a range of ±10° around the vertical, and can reach almost 40° before the illusion starts to seriously break.
This lets us add the finishing touch:
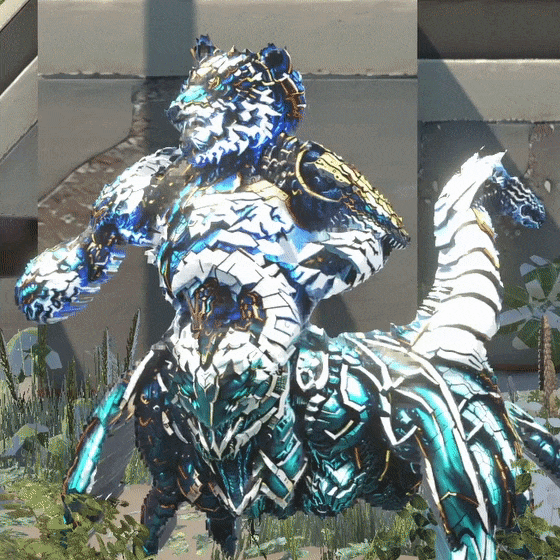
Gonna eat ya....
We slowly oscillate the character's rotation from side to side while it faces the camera; because the model's actual depth doesn't match the perceived depth from its shading, this creates a illusion of complex motion as parts of the character occlude others in unexpected ways. (Byarn may not be the most striking example of this in the game, but he's the one we're using and you don't jump rails amidships, as the saying goes.) It's alive!
By putting all of these techniques together, we're able to create a superficially plausible 3D model that idles facing the camera - and we're able to do so fast enough that a developer working alone can design almost a dozen such enemies for a 7 day jam. Not bad!
Perhaps next jam, animation?
Thanks for reading.
- tjm
Comments
Log in with itch.io to leave a comment.
Nice process, thanks for sharing!
Interesting technique! Thanks for sharing.